Dentist Clinic Interior tips
KanikaDecor giving designing an indoor layout for a dental (dentist) clinic involves balancing functionality, hygiene, and comfort (especially to reduce patient anxiety). Here are tips + principles you can apply (and adapt to your space constraints, budget & local regulations):
1. Layout & Flow
- Clear zoning / segmentation
Divide the clinic into functional zones: reception & waiting, consultation / treatment rooms, sterilization / lab area, staff zone (storage, break room), and restrooms. Ensure these areas have logical adjacency. - Efficient patient flow
Plan routes in such a way that patients move smoothly: entrance → reception → waiting → treatment → exit, minimizing crossing paths with staff traffic or sterile areas. - Treatment room design
• Decide on entry style: single-entry, dual-entry, open bay, etc. Each has pros/cons.
• Place utilities (electrical, plumbing, compressed air, suction lines) in advance to reduce clutter of cables & hoses.
• Consider modular cabinetry / furniture so you can reconfigure later as needed.
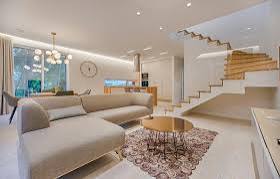
2. Aesthetics, Ambience & Patient Comfort
- Color scheme & materials
Use calming, soft, neutral colors, pastels or muted tones (soft greens, blues, whites) which help reduce patient anxiety.
Use durable, easy-to-clean materials (ceramic tiles, high-grade vinyl, antimicrobial surfaces). - Lighting
Combine ambient (general) lighting + task lighting (for work areas) + accent lighting (to enhance aesthetics). Avoid harsh glare. - Natural light & views
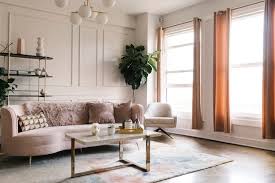
If possible, bring in daylight to waiting or corridors (via windows, frosted glass) while ensuring privacy. - Warm, friendly touches
Use soft furnishings, curved forms, plants, art, and distractions (TVs, magazines) in waiting area. A “home-like” feel helps reduce stress. - Entertainment / distraction during treatment
Installing TV screens overhead or on walls, music, or visual distractions can help patients relax.
3. Hygiene, Safety & Regulatory Considerations
- Zoning of “clean” vs “dirty” areas
Sterilization, waste disposal, and consumables storage must be segregated and ideally have controlled access. - Smooth, sealed surfaces
Flooring, walls, ceilings should use materials that are nonporous, easy to clean, resistant to chemicals & disinfectants. - Ventilation & air control
Proper HVAC with filtration, sufficient air exchanges, and control of humidity. Also consider negative pressure rooms if needed (for infection control). - Radiation safety
If you have X-ray / imaging equipment, ensure shielding (lead-lined walls, lead glass) per regulations. - Electrical safety and cable management
Conceal cables, minimize trip hazards. Use dependable power outlets with proper grounding, backup power (UPS) for critical equipment.
4. Equipment Integration & Ergonomics
- Minimize clutter of hoses, wires, instruments
Use built-in / integrated equipment delivery systems so that wires/hose trails are hidden. - Work triangle & reach
Arrange equipment, instruments, and supplies so the dentist and assistant have ergonomic, minimal movements. - Flexible / modular stations
Design workstations so they can adapt — e.g. movable cabinets or carts. - Future proofing
Leave capacity (space, wiring, conduits) for future upgrades (new machines, extra chairs).
5. Branding & Visual Identity
- Use your brand colors, logo, signage in reception, walls, graphics in a tasteful way to reinforce professionalism.
- Consistency in fonts, signage, visuals across clinic areas enhances patient trust.
- Use quality sign (directional labels, room names) so patients don’t get lost.
6. Budgeting, Phasing & Practical Tips
- Prioritize core needs first (sterilization, treatment rooms, basic finishes), then add “nice-to-haves” (decor, extra lounge amenities).
- Work with a specialist
Use an interior designer or architect experienced in medical/dental clinic design — they understand regulations, workflows, equipment constraints. - Phased implementation
If budget is tight, implement in phases: start with reception & primary treatment rooms, then aenhancements gradually. - Get multiple quotes & check references
For construction, contractors, materials – compare costs, quality, timelines. - Minimize downtime
Plan construction in off hours or in sections so clinic partially function during renovation.